Skip to content

Photo prints, posters, canvas

Upscale an image for print

For a sharper print, calculate the pixels your paper size needs, then compare that target with your image dimensions. If the file is too small, Upscale 4× or 8× can enlarge it; changing the DPI tag alone adds no detail. Check a proof before ordering a large print.

  • Calculator runs in your browser
  • Output up to 80 MP
  • 3 free credits a day
  • No sign-up
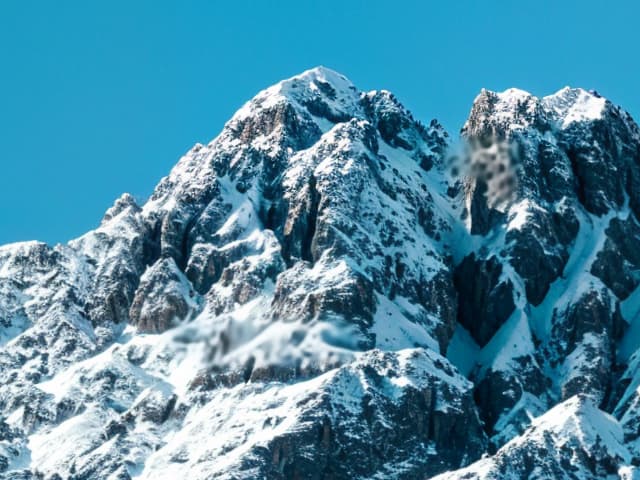
Left mountain ridge in a small landscape photograph: Upscaled
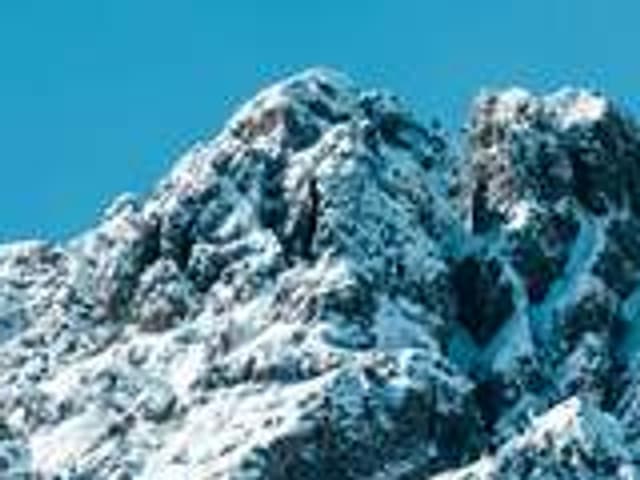
Left mountain ridge in a small landscape photograph: Standard resize
Standard resizeUpscaled

Upscale 4× · 480 × 320 → 1920 × 1280

Real GPU run on a small landscape photo. Left: a 160 × 120 source crop enlarged with ordinary bicubic resize. Right: the corresponding 640 × 480 crop of the 4× output. The source was a downscaled photograph, not a native 480-pixel camera capture. · Photo: Francesco Ungaro / Unsplash

Tested settings and honest limits

This saved run used Upscale 4× on a 480 × 320 landscape, producing 1920 × 1280 pixels. At 300 PPI that full result spans 6.4 × 4.27 inches before any crop to the paper ratio. It is still too small for an 8 × 10 inch print at 300 PPI, which needs 2400 × 3000 pixels.

Compare the ridge edges with the ordinary resize, then examine the snow texture. Our deployment tests found localized soft/sharp texture switches in this mountain fixture. More pixels do not guarantee uniform detail, and this example has not been printed or judged on paper.

Use the calculator to check the target before choosing Upscale 4× or 8×. Order a small proof before a valuable print. Neither model repairs scratches or tears, and plausible new texture is not evidence of what the camera captured.

Read how we test and where our evidence stops. These are saved engine outputs, cropped for the web without retouching.

Print size calculator

Enter your photo's size or read it from the file, pick a print size, and see whether it is enough, and which upscale gets you there.

1. Your photo, in pixels

1.9 MP photo

3. Sharpness target

Largest print from this file as it is

at 300 DPI
5.3 × 4 in
14 × 10 cm
at 240 DPI
6.7 × 5 in
17 × 13 cm
at 150 DPI
10.7 × 8 in
27 × 20 cm

8 × 10 in at 300 DPI needs

3,000 × 2,400 px

Your photo has to grow 2× in width and height. The paper has a different shape, so about 6% of the photo will be cropped.

Use Upscale 4×.

The result is 6,400 × 4,800 px (31 MP); crop it to the paper shape.

Free plan: photos up to 8 MP, results watermarked. Paid plans: up to 30 MP in, no watermark. Output up to 80 MP.

Upscale your photo

Drop the photo here and choose the scale the calculator suggested. Upscale 4× uses 1 credit per photo and Upscale 8× uses 2. Free: 3 credits a day, uploads up to 3 MB and 8 MP, with a watermark, so use it to test. For files you send to a print lab, Pro or Pro+ give watermark-free results from photos up to 20 MB and 30 MP.

Prints need pixels, not a DPI number

A print is sharp when there are enough pixels for every inch of paper. That density is what people mean by DPI when they talk about prints, although the correct term is PPI, pixels per inch. A photo that is 3000 pixels wide printed 10 inches wide has 300 PPI.

DPI strictly means the dots of ink a printer lays down, which is a property of the printer, not of your file. And the "DPI" or "resolution" field stored inside a JPEG is just a label: changing it from 72 to 300 in an editor, without adding pixels, does not change the print at all. If a website or shop asks for "300 DPI", what it really needs is enough pixels for the size you ordered at 300 per inch. Our page on converting an image to 300 DPI walks through that request step by step.

The maths is simple: pixels needed = print size in inches × PPI. For centimetres, divide by 2.54 first. The calculator above does this for you, in both directions, and the table below has the common sizes.

How many pixels each print size needs

300 PPI is the classic target for photos held in the hand. Most people cannot tell 240 from 300 on a wall print, and posters and canvas viewed from a few steps away look sharp at 150.

Pixels needed per print size at 300, 240 and 150 PPI (long side matched to the long side of the photo)
Print size300 PPI240 PPI150 PPI
4 × 6 in (10 × 15 cm)1200 × 1800960 × 1440600 × 900
5 × 7 in1500 × 21001200 × 1680750 × 1050
8 × 10 in2400 × 30001920 × 24001200 × 1500
11 × 14 in3300 × 42002640 × 33601650 × 2100
16 × 20 in4800 × 60003840 × 48002400 × 3000
20 × 30 in6000 × 90004800 × 72003000 × 4500
24 × 36 in7200 × 108005760 × 86403600 × 5400
A4 (210 × 297 mm)2480 × 35081984 × 28061240 × 1754
A3 (297 × 420 mm)3508 × 49612806 × 39691754 × 2480
A2 (420 × 594 mm)4961 × 70163969 × 56132480 × 3508

To find the smallest photo that reaches a size with one upscale, divide by the scale and round up: an 8 × 10 at 300 PPI needs 2400 × 3000, so a 600 × 750 photo gets there with Upscale 4×, and a 300 × 375 one with Upscale 8×.

Smallest photo that reaches each print size at 300 PPI with one upscale
Print sizePixels at 300 PPISmallest photo for 4×Smallest photo for 8×
4 × 6 in1200 × 1800300 × 450150 × 225
5 × 7 in1500 × 2100375 × 525188 × 263
8 × 10 in2400 × 3000600 × 750300 × 375
11 × 14 in3300 × 4200825 × 1050413 × 525
16 × 20 in4800 × 60001200 × 1500600 × 750
20 × 30 in6000 × 90001500 × 2250750 × 1125
24 × 36 in7200 × 108001800 × 2700900 × 1350
A4 (210 × 297 mm)2480 × 3508620 × 877310 × 439
A3 (297 × 420 mm)3508 × 4961877 × 1241439 × 621
A2 (420 × 594 mm)4961 × 70161241 × 1754621 × 877

Each scale has an input limit so that the result stays within 80 MP: Upscale 4× accepts photos up to 5 MP, and Upscale 8× up to 1.25 MP. A bigger photo rarely needs 8× anyway. If your photo is larger than the limit, use 4× instead, or reduce the photo first; the calculator tells you when.

Larger than all of these already? A 12 MP phone photo covers 8 × 10 in at 300 PPI without any upscaling. Upscale only when the calculator says the photo falls short.

How big can I print my photo?

Divide each side by the PPI you want. Some common files:

  • A 12 MP phone photo (4032 × 3024) prints at about 13 × 10 in (34 × 26 cm) at 300 PPI, 17 × 13 in at 240, and 27 × 20 in at 150, before any upscaling.
  • A photo received on WhatsApp in standard quality (about 1600 × 1200) prints at about 5 × 4 in at 300 PPI. After Enhance and Upscale 4× it is 6400 × 4800, enough for 16 × 20 in at 300 PPI.
  • An image saved from a website (often 600 to 1200 px wide) prints at 2 to 4 inches wide at 300 PPI. Upscale 4× or 8× takes it to 8 to 16 inches and more.
  • The 80 MP output limit of our upscalers is about 10950 × 7300 pixels for a 3:2 photo: roughly 36 × 24 in at 300 PPI, or a large canvas at 150.

Viewing distance: why posters need fewer pixels

Your eye resolves detail by angle, not by inches. A common rule of thumb based on normal eyesight is that you stop seeing individual pixels at about 300 PPI from 30 cm (12 in, a print in your hand), 150 PPI from 60 cm (a print on a desk or small wall), and well under 100 PPI from 1.5 to 2 metres, the distance at which people look at a large poster or canvas.

So for a big print, choose 150 PPI in the calculator before you conclude that your photo is too small. The poster size guide has the pixel counts for common poster formats. If you know people will walk up close to it, aim higher, and remember that a sharp, clean file matters more than hitting an exact number.

"Resolution too low" warnings from print shops

Online print services check the pixel size of your upload against the product you chose and show a warning when it falls short. Shutterfly's help centre, for example, describes its low-resolution warning as a sign that the image "may not meet the minimum size requirements for quality printing", notes that a photo that looks fine on screen may still print poorly, and says that 3 megapixels or more is acceptable for standard prints. Each service sets its own thresholds per product, and they rarely publish them, so we do not quote numbers for specific shops.

Shutterfly also recommends choosing a higher-resolution image rather than enlarging the one you have, and that is good advice: the original file always beats an upscale. Look for it first, in your phone's gallery, your cloud backup or with the person who took the photo. Upscaling is for when a small copy is all you have.

When the shop's warning disappears after upscaling, it means the pixel count is now right for the size. It does not by itself mean the print will look good, which is why the 100% check below matters.

Step by step: preparing a photo for print

  1. Check the size. Enter your photo's pixels in the calculator (or let it read them from the file, which stays on your device) and pick the print size and PPI. To look up the pixels yourself: on Windows, right-click the file and open Properties, then Details; on a Mac, open it in Preview and choose Tools, then Show Inspector; on a phone, open the photo and swipe up or tap the info button.
  2. Clean first if needed. If the photo shows grain or compression blocks at 100% zoom, run Enhance first, at the same size. Upscaling a noisy file enlarges the noise too.
  3. Upscale with the suggested scale. 4× for most photos (1 credit); 8× for very small images (2 credits), best on landscapes, nature and buildings. If the calculator says to reduce the photo first, it is because the output would pass the 80 MP limit.
  4. Crop to the paper shape yourself. A 4 × 6 is 2:3, an 8 × 10 is 4:5, A sizes are about 1:1.41. Most phone photos lose a strip on one side; decide which strip rather than letting the lab decide.
  5. Check at 100% and export. Look at faces, edges and any text, then save as a high-quality JPG or PNG and upload that file to the print service.

When upscaling will not save the print

Upscaling adds pixels and rebuilds edges and texture, but it cannot add information that was never captured. If the photo is blurred by camera shake or missed focus, enlarging it makes the blur bigger. If the subject is tiny in the frame, cropping and upscaling will not create a sharp portrait. In those cases choose a smaller print: a sharp 5 × 7 looks better than a soft 16 × 20.

At 8×, 63 of every 64 pixels are created by the model. The large shapes and colours come from your photo; the fine texture is a plausible reconstruction, not a record of the scene. That is fine for mountains and foliage, and the reason we recommend 4× from a larger original for faces.

Text on the print. Both upscalers are built for photographs, and text protection tries to keep detected lettering out of the detail stage. Small text can remain soft, and dense print can be missed or changed incorrectly. For posters that are mostly lettering, logos or line art, start from the original vector or high-resolution file instead.

Scans of old prints can be upscaled too, but our models do not repair scratches, tears, stains or fading.

What upscaling will not do

  • It does not fix camera shake, missed focus or heavy motion blur.
  • Very small faces are not restored to a recognisable likeness.
  • Small text can remain soft; text protection can miss dense print and leave incorrect letters. Compare every important character with the original.
  • It does not repair scratches, tears, stains or fading on old prints.
  • Output is limited to 80 MP; free uploads to 3 MB and 8 MP, paid uploads to 20 MB and 30 MP.
  • Free results are watermarked, so use a paid plan for files you send to print.

Questions

How do I make an image 300 DPI?

Give it enough pixels for the size at 300 per inch: print width in inches × 300, by height × 300. Changing the DPI field in an editor without adding pixels does nothing to the print. If the photo is too small, upscale it 4× or 8×.

What resolution do I need to print a photo?

About 300 pixels per inch for prints seen up close: 1200 × 1800 for 4 × 6 in, 2400 × 3000 for 8 × 10 in and 2480 × 3508 for A4. Posters seen from a distance look sharp at 150.

How big can I print a 12 megapixel photo?

A 4032 × 3024 photo prints at about 13 × 10 in at 300 PPI, 17 × 13 in at 240 and 27 × 20 in at 150. Upscaled 4× (after reducing it to 5 MP to stay under the 80 MP output limit) it covers about 34 × 26 in at 300.

Why does the print shop say my photo resolution is too low?

The file has fewer pixels than the shop wants for that product size. Use the original file if you can find it, choose a smaller size, or upscale the photo so it has enough pixels.

Have these results been tested as prints?

No. The examples are saved GPU outputs inspected on screen. Calculate the pixel target, inspect the complete file, then ask your printer for a small proof.

Processing photos in bulk or inside your own app? Use the image enhancement and upscaling API